Configure in SAN MACHINE , Once Completed..Then follow belows steps
[root@node3 ~]# iscsiadm -m discovery -t sendtargets -p 192.168.1.151
[root@node3 ~]# service iscsi status[root@node3 ~]# iscsiadm -m node -T iqn.2006-01.com.openfiler:tsn.6b37e5d0a3ae 192.168.1.151 --login
[root@node3 ~]# fdisk -l
[root@node3 ~]# iscsiadm -m node -T iqn.2006-01.com.openfiler:tsn.6b37e5d0a3ae 192.168.1.151 -o
update -n node.startup -v automatic
---All from Root user only
cat /etc/grep |grep dba
cat /etc/grep |grep onstall
userdel -r oracle
groupdel oinstall
groupdel dba
groupadd -g 1001 oinstall
groupadd -g 1002 dba
groupadd -g 1003 asmdba
groupadd -g 1004 asmadmin
groupadd -g 1005 asmoper
cat /etc/group
useradd -u 1101 -g oinstall -G asmdba,asmoper,asmadmin griduseradd -u 1102 -g oinstall -G dba,asmdba oracle
passwd grid
passwd oracle
NODE 01
cd /u01
mkdir app
chown -R root:oinstall app
or
chown -R root:oinstall /u01/app/
---For Grid user (GI)
mkdir -p /u01/app/grid/
chown -R grid:oinstall /u01/app/grid/
mkdir -p /u01/app/11.2.0/grid/
chown -R grid:oinstall /u01/app/11.2.0/grid/
---For oracle user (RDBMS)
mkdir -p /u01/app/oracle/
chown -R oracle:oinstall /u01/app/oracle/
mkdir -p /u01/app/oracle/product/11.2.0/dbhome_1/
chown -R oracle:oinstall /u01/app/oracle/product/11.2.0/dbhome_1/
---Create on both nodes orainventory then you can follow below steps
mkdir -p /u01/app/oraInventory/
chown -R grid:oinstall /u01/app/oraInventory/
#rpm -qa|grep oracle
/etc/init.d/oracleasm configure
user : grid
group : asmdba
Y
Y
#oracleasm scandisks
#oracleasm listdisks
----Update on both nodes
vi /etc/hosts
192.168.1.101 node1.dbacentre.com node1
192.168.1.102 node2.dbacentre.com node2
192.168.1.103 node3.dbacentre.com node3
192.168.1.141 node1-vip.dbacentre.com node1-vip
192.168.1.142 node2-vip.dbacentre.com node2-vip
192.168.1.143 node3-vip.dbacentre.com node3-vip
10.0.0.11 node1-priv.dbacentre.com node1-priv
10.0.0.12 node2-priv.dbacentre.com node2-priv
10.0.0.13 node3-priv.dbacentre.com node3-priv
192.168.1.194 scan1
---Update resource limits with oracle and grid
vi /etc/security/limits.conf
oracle soft nproc 2047
oracle hard nproc 16384
oracle soft nofile 1024
oracle hard nofile 65536
oracle soft stack 10240
oracle hard stack 32768
grid soft nproc 2047
grid hard nproc 16384
grid soft nofile 1024
grid hard nofile 65536
grid soft stack 10240
grid hard stack 32768
---update bash_profile on root user to crsctl on new node
#--here you need to set oracle crs from from /bin
PATH=$PATH:$HOME/bin:/u01/app/11.2.0/grid/bin
----On New Node
-----grid bash profile
export PATH
export ORACLE_BASE=/u01/app/grid
export ORACLE_HOME=/u01/app/11.2.0/grid
export PATH=$PATH:$ORACLE_HOME/bin
which asmca
-----oracle bash profile
export PATH
export oracle_BASE=/u01/app/oracle
export ORACLE_HOME=/u01/app/oracle/product/11.2.0/dbhome_1
export PATH=$PATH:$ORACLE_HOME/bin
--enabling ssh for adding a new node
----grid NODE3
su - grid
mkdir ~/.ssh
chmod 755 ~/.ssh
cd ~/.ssh
/usr/bin/ssh-keygen -t rsa
From with grid user node1 (copy)
scp ~/.ssh/authorized_keys node3:/home/grid/.ssh/.
From Node3
cat id_rsa.pub >> authorized_keys
---Moving
scp authorized_keys node2.dbacentre.com:/home/grid/.ssh/.
scp authorized_keys node1.dbacentre.com:/home/grid/.ssh/.
--enabling ssh for adding a new node
----oracle
su - oracle
mkdir ~/.ssh
chmod 755 ~/.ssh
cd ~/.ssh
/usr/bin/ssh-keygen -t rsa
From node1 with oracle user(copy)
scp ~/.ssh/authorized_keys node3.dbacentre.com:/home/oracle/.ssh/.
From Node3
cat id_rsa.pub >> authorized_keys
---Moving
scp authorized_keys node2.dbacentre.com:/home/oracle/.ssh/.
scp authorized_keys node1.dbacentre.com:/home/oracle/.ssh/.
--from node1 or node2
cluvfy stage -pre nodeadd -n node3 ./addNode.sh "cluster_new_nodes={node3}" "cluster_new_virtual_hostnames={node3-vip}"
GI_HOME/oui/bin/addNode.sh -silent “CLUSTER_NEW_NODES={node3}” “CLUSTER_NEW_VIRTUAL_HOSTNAMES={node-vip3}”
---from node1 from oracle user
./addNode.sh "cluster_new_nodes={node3}"
--from any node1 or node2
Oracle user
oracle$cd /u01/app/oracle/product/11.2.0/dbhome_1/oui/bin
oracle$./addNode.sh "cluster_new_nodes={node3}"
[oracle@node2 bin]$ ls
addLangs.sh attachHome.sh filesList.bat filesList.sh resource runInstaller runSSHSetup.sh
addNode.sh detachHome.sh filesList.properties lsnodes runConfig.sh runInstaller.sh
[oracle@node2 bin]$ ./addNode.sh "cluster_new_nodes={node3}"
Starting Oracle Universal Installer...
Checking swap space: must be greater than 500 MB. Actual 1523 MB Passed
Checking monitor: must be configured to display at least 256 colors. Actual 16777216 Passed
Oracle Universal Installer, Version 11.2.0.1.0 Production
Copyright (C) 1999, 2009, Oracle. All rights reserved.
Performing tests to see whether nodes node1,node3 are available
............................................................... 100% Done.
Oracle Text 11.2.0.1.0
Oracle Net Services 11.2.0.1.0
Oracle Database 11g 11.2.0.1.0
Oracle OLAP 11.2.0.1.0
Oracle Spatial 11.2.0.1.0
Oracle Partitioning 11.2.0.1.0
Enterprise Edition Options 11.2.0.1.0
-----------------------------------------------------------------------------
Instantiating scripts for add node (Wednesday, September 3, 2014 9:29:40 PM IST)
. 1% Done.
Instantiation of add node scripts complete
Copying to remote nodes (Wednesday, September 3, 2014 9:29:47 PM IST)
............................................................................................... 96% Done.
Home copied to new nodes
Saving inventory on nodes (Wednesday, September 3, 2014 9:55:14 PM IST)
. 100% Done.
Save inventory complete
WARNING:
The following configuration scripts need to be executed as the "root" user in each cluster node.
/u01/app/oracle/product/11.2.0/dbhome_1/root.sh #On nodes node3
To execute the configuration scripts:
1. Open a terminal window
2. Log in as "root"
3. Run the scripts in each cluster node
The Cluster Node Addition of /u01/app/oracle/product/11.2.0/dbhome_1 was successful.
Please check '/tmp/silentInstall.log' for more details.
On NODE3
You can execute
/u01/app/oracle/product/11.2.0/dbhome_1/root.sh
Running Oracle 11g root.sh script...
The following environment variables are set as:
ORACLE_OWNER= oracle
ORACLE_HOME= /u01/app/oracle/product/11.2.0/dbhome_1
Enter the full pathname of the local bin directory: [/usr/local/bin]:
The file "dbhome" already exists in /usr/local/bin. Overwrite it? (y/n)
[n]: ENTER
The file "oraenv" already exists in /usr/local/bin. Overwrite it? (y/n)
[n]: ENTER
The file "coraenv" already exists in /usr/local/bin. Overwrite it? (y/n)
[n]: ENTER
Entries will be added to the /etc/oratab file as needed by
Database Configuration Assistant when a database is created
Finished running generic part of root.sh script.
Now product-specific root actions will be performed.
Finished product-specific root actions.
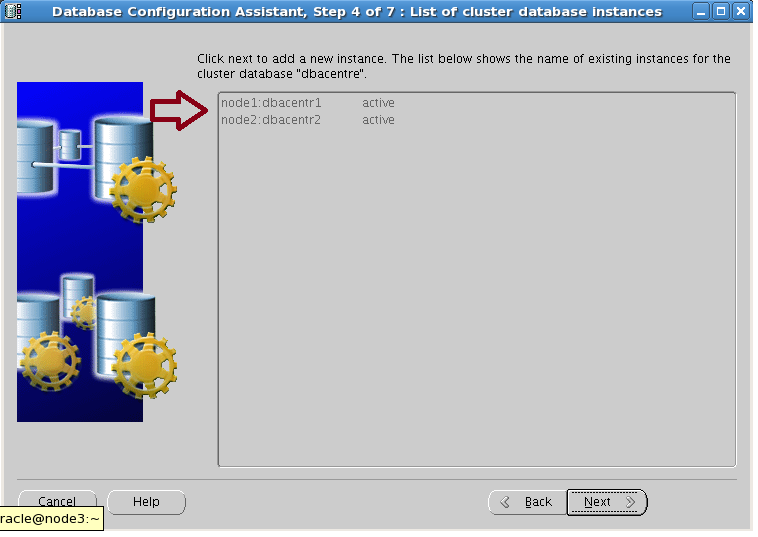
Once Oracle software is installed, add a database
root#xhost +
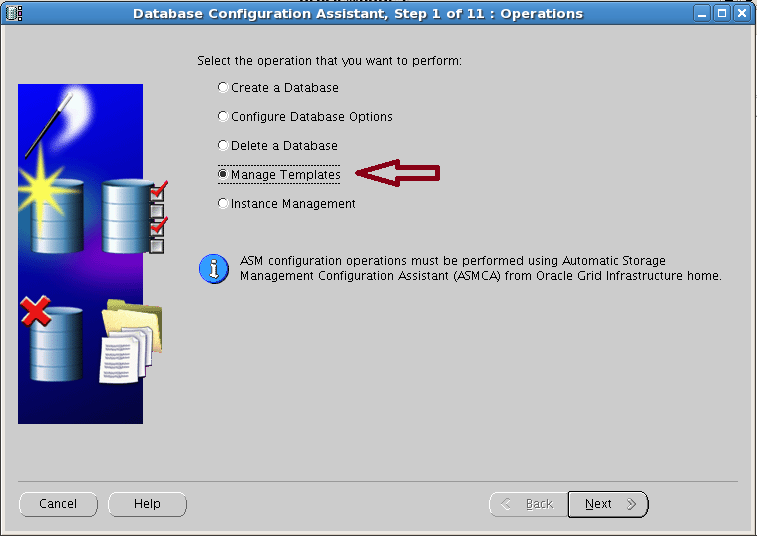
oracle#dbca

Next >
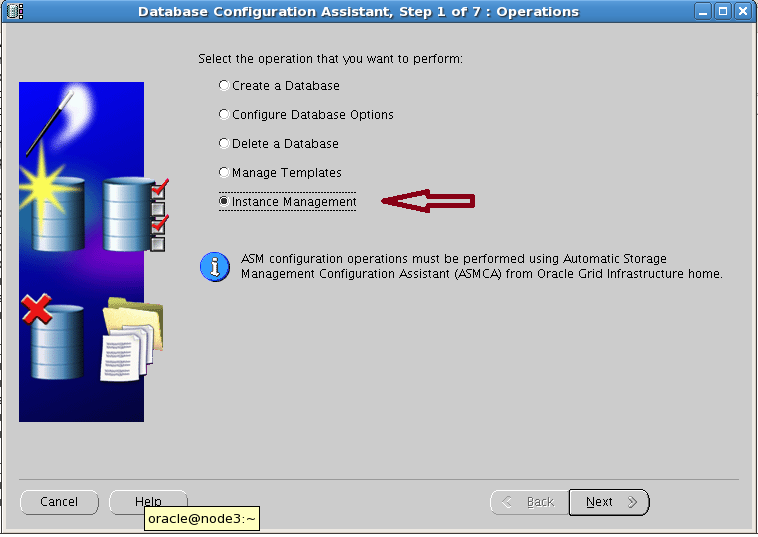
..

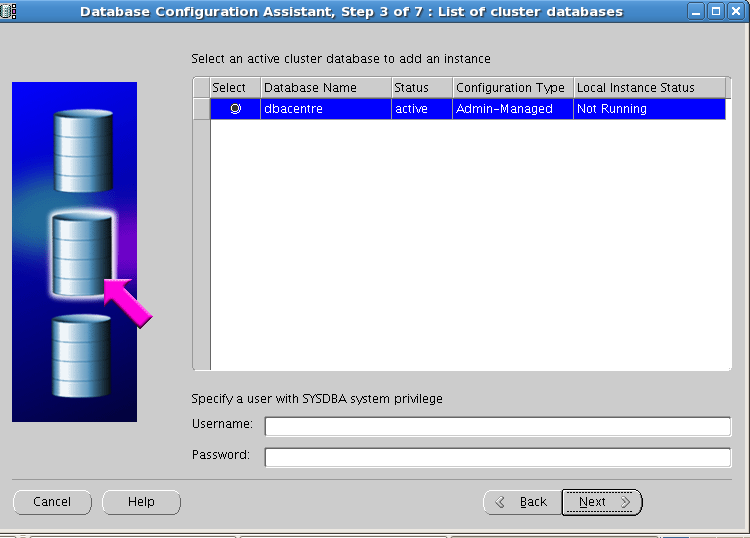

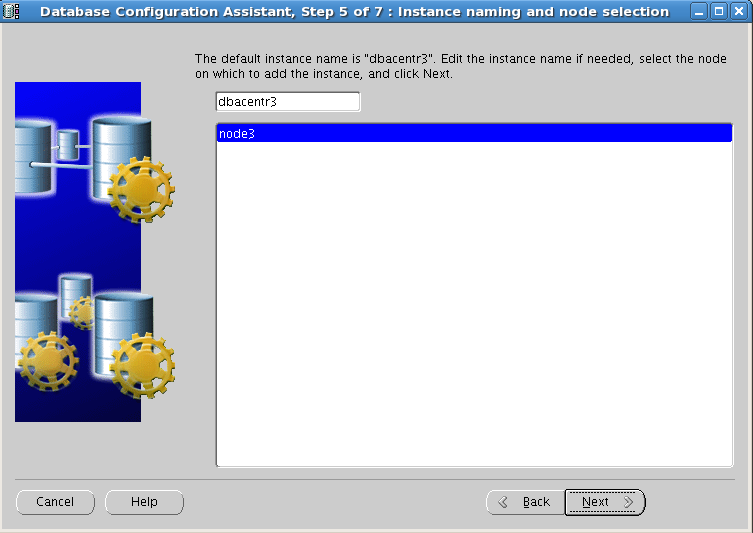
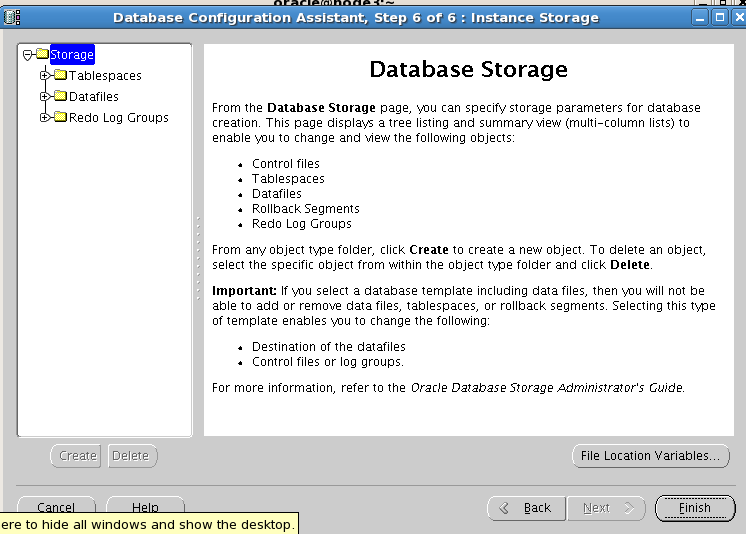
Go Next >
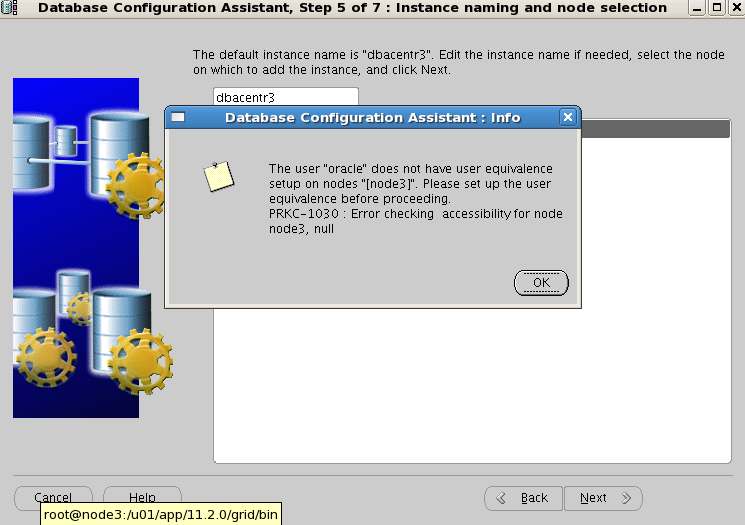
Verify once
[root@node3 bin]# ./srvctl status vip -n node3
PRKO-2165 : VIP does not exist on node(s) : node3
To Fix
[root@node3 bin]# ./srvctl add vip -A 192.168.1.143/255.255.255.0/eth0 -n node3 -k 1
[root@node3 bin]# ./srvctl status vip -n node3
VIP 192.168.1.143 is enabled
VIP 192.168.1.143 is not running
[root@node3 bin]# ./srvctl start vip -n node3
Verify once
[root@node3 bin]# ./srvctl status vip -n node3
VIP 192.168.1.143 is enabled
VIP 192.168.1.143 is running on node: node3
Its done.completed